


Herringbone flooring is a timeless and elegant choice that can instantly elevate the aesthetics of your home. Its intricate pattern exudes sophistication and creates a sense of movement in a space. While installing herringbone flooring may seem daunting, with proper preparation and the right approach, you can achieve professional-quality results. Here’s a comprehensive guide, brimming with practical tips and tricks, to help you lay your herringbone flooring like a pro.
What is Herringbone Flooring?
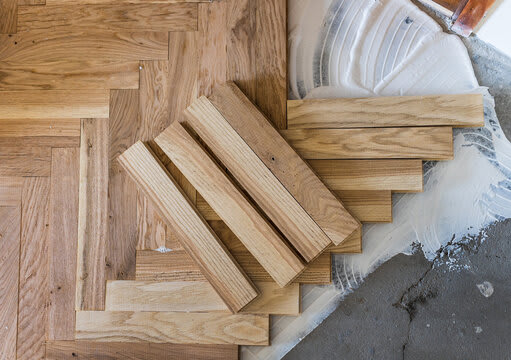
Before we dive in, let’s take a moment to understand herringbone flooring. It is a type of parquet pattern where rectangular blocks are arranged in a zig-zag formation, resembling the bones of a fish (hence the name). This layout adds a layer of complexity and texture to any room, making it a popular choice for homeowners seeking a blend of modern and traditional styles.
Preparing for the Installation
1. Choose the Right Materials
-
Opt for engineered wood, luxury vinyl tiles (LVT), or solid wood, depending on your needs and budget. Engineered wood offers a real wood finish with added stability, while LVT is a budget-friendly, durable option that replicates the look of natural wood and is highly resistant to moisture. Solid wood remains a classic choice for its authentic charm and longevity, although it requires more maintenance and care in moisture-prone areas.
-
Ensure your flooring material is pre-finished if you want to avoid sanding and sealing after installation
2. Measure and Plan
-
Measure the room’s dimensions to calculate the total area and add an extra 10% for cuts and waste.
-
Decide on the direction of your herringbone pattern. For most rooms, running the pattern along the longest wall creates a visually pleasing effect.
3. Prepare the Subfloor
-
A smooth, level, and clean subfloor is crucial. Remove old flooring, patch any uneven spots, and vacuum thoroughly.
-
For added durability, install an underlay for noise reduction and insulation.
Laying the Herringbone Flooring
1. Mark Your Starting Point
-
Find the centre of the room by snapping chalk lines from the middle of opposite walls. The intersection of these lines marks the starting point.
-
Lay a temporary row of planks to test your layout and adjust for symmetry if necessary.
2. Create a Template
-
Use a piece of scrap wood to cut a 90° template. This will help maintain consistent angles throughout the installation.
3. Dry Fit the Planks
-
Before adhering the planks, lay a few rows in a dry run to ensure the pattern lines up correctly and to practice the technique.
Adhesive and Installation Tips
1. Use the Right Adhesive
-
Apply a high-quality wood adhesive to the subfloor using a trowel. For LVP, follow the manufacturer’s instructions for adhesive or click-lock systems.
2. Start from the Centre
-
Begin laying the planks at the starting point, working outward in both directions. Press each plank firmly into place, ensuring a snug fit.
3. Maintain Precision
-
Use spacers to ensure consistent gaps around the edges of the room for expansion. These will be covered by skirting boards later.
-
Regularly check the alignment of your pattern with a straightedge or laser level.
4. Trim for a Perfect Fit
-
When you reach the edges of the room, use a mitre saw to trim the planks to size. Always double-check measurements before cutting.
Finishing Touches
1. Install Skirting Boards
-
Once the flooring is complete, attach skirting boards to cover the expansion gaps and give the room a polished look.
2. Seal and Protect
-
If your flooring isn’t pre-finished, apply a protective sealant. This enhances the wood's durability and helps resist stains and scratches.
Common Mistakes to Avoid
1. Skipping Subfloor Preparation
-
An uneven subfloor can cause gaps and misalignment in your herringbone pattern.
2. Starting Without a Plan
-
Failing to plan the layout can lead to uneven patterns and wasted materials.
3. Neglecting Expansion Gaps
-
Always leave space for the flooring to expand and contract with temperature changes.
4. Rushing the Process
-
Take your time to ensure each plank is perfectly placed and aligned. Patience is key to achieving a flawless finish.
Tips for Success
-
Invest in Quality Tools: A good mitre saw, straightedge, and adhesive applicator will make the job easier and yield better results.
-
Work in Small Sections: Apply adhesive to a small area at a time to prevent it from drying out before you can lay the planks.
-
Clean as You Go: Wipe away excess adhesive immediately to avoid it drying on the surface.
-
Seek Help if Needed: Don’t hesitate to enlist a friend or family member to assist, especially for larger rooms.

A Personal Touch
A lovely customer recently shared her experience with herringbone flooring in her dining room. Despite initial nerves, she followed these steps and was thrilled with the outcome. Her favourite tip? Laying out the entire pattern beforehand to visualise the result. She described how the flooring transformed her space into a warm and inviting haven for family dinners and celebrations.
Conclusion
Laying herringbone flooring might require a bit of patience, but the stunning results are well worth the effort. With careful preparation, attention to detail, and these tips and tricks, you can achieve a professional finish that adds character and charm to your home.
For more advice and inspiration, don’t forget to check out my other blogs. Whether you’re exploring trendy flooring options or need help choosing pet-friendly materials, there’s plenty to discover.
Happy flooring!


Please complete your information below to login.